Craft Project – Baby’s Quilt
This is a beginners guide to sewing. Any newcomer can give it a go. It is not quilting in the traditional form, but anyone looking to create a baby’s quilt can, just by following these simple instructions.
Baby’s Quilt
You will need
A large patterned fabric with “Pooh Bear” (or any other design that you like) with an approximate width of 80cm and a length of 110cm (measure cot to determine – allow for 1.5cm seam allowances).
- A contrasting fabric for the lining and flaps, the same size as the design fabric and an extra 60cm length for the flaps.
- Polyester filling (dacron) in sheet form, the same size as the designed fabric.
- A sewing machine
- Pins
- Tape Measure
- Iron and Ironing Board
- Needle and thread – Thread (I have used white as I want it to blend in with the background color of the fabric, select which color you like as you may wish to contrast it with the fabric).
Quilt Step 1:
Cut your lining fabric to suit the same size as the front. Cut the fabric for the flaps in two. Cut the Polyester Filling to match the size of the design fabric. (I have used two layers of filling as it is very cold where I live).
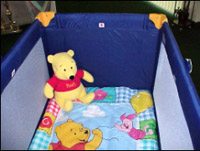
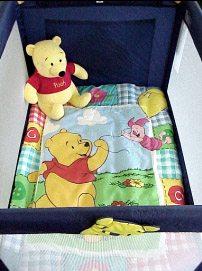
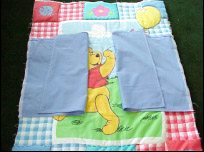
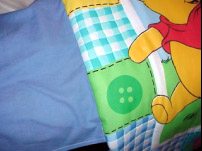
Completed Baby’s Quilt
Quilt Step 2:
Press all the fabric. While you are doing this, look at the design and decide which areas you would like to highlight.
Quilt Step 3:
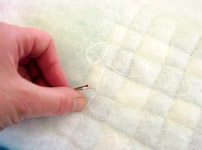
Pin one layer of filling to the design piece of fabric around the edges, and regularly through the centre to keep them two pieces together.Then selecting the largest area that you want to highlight, pin around it ready to sew.
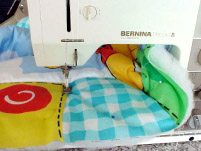
Quilt Step 4:
Following the outline of the design (picture) sew.
You are now attaching the filling to the main fabric.
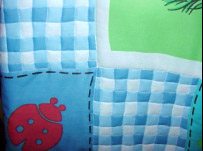
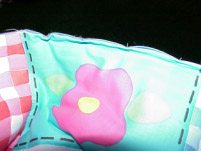
Continue in this manner, selecting areas to stitch, then sew them.
Quilt Step 5:
Once you have sewed around all the designs/pictures that you require.
Trim all the loose threads from the front and back.
Baby Quilt Step 6:
Press the right side of the quilt. Remembering to admire your good work. If you see any mistakes or things that you are unhappy with, unpick them and stitch them again.
Baby Quilt Step 7:
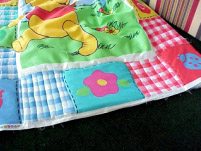
Fold under 6mm around three edges of each flap with the wrong side facing you. Over lock or over edge fourth side. Press. Trim the corners to remove excess fabric and fold over again, press and pin. Topstitch the edges making neat turns at each corner. Press.

Baby Quilt Step 8:
Lay the main quilt onto a flat surface. Take a measuring tape and find the halfway point of the quilt fabric length. Place a pin here. Take the flaps, fold them in half with wrong sides inwards and with sewn edges matching, (this is to find the centre point). Take a flap and match the fold to the centre pin on the quilt. Open it out and pin it along the edge of the quilt. (The right sides are now together). Sew a 1cm seam to join the flaps to the quilt.
Baby Quilt Step 9:
Put the quilt to one side. Take the lining fabric and the second piece of polyester filling. With the right side of the fabric facing up and the filling behind pin the two items together. Using the tape measure divide the length into quarters. Mark these horizontally with tailors chalk and a ruler (or pin them across). Sew horizontally to join the fabric to the filling. (Remembering to remove the pins as you go if you chose that option). Press.
Baby Quilt Step 10:
Take the quilt front and place on a flat surface. Fold the flaps into the centre. Take the back lining and with the right sides together pin the two together. (It is now very bulky and difficult to manage). Trim a small amount of the filling around the entire edges both sides to make sewing the seam easier. Remember to leave an opening at the bottom of the quilt large enough to pull the quilt back through. Approx 30 cm.
Baby Quilt Step 11:
Sew around the entire quilt with a seam of 1.5 cm, paying careful attention at the corners to make them straight and even.Trim corners and filling, then pull the quilt back through the opening. Press. Pin the opening together and with a needle and thread slip stitch close the opening.
There we have it. A completed baby’s quilt.