Planning a Living Room
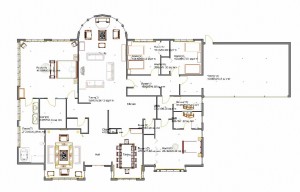
(please note clicking on the illustration will give you a larger view)
How to Start Planning
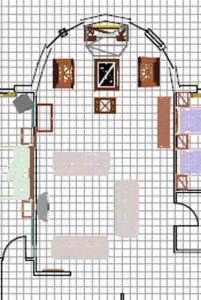
The simplest solution to planning is using the bubble diagram to establish relationships and positions initially and then defining the space by measured area, taking into account what you are trying to place in the room will determine the sizes of areas that are required. Balance of the placement can be controlled by the shape and size of the furniture and tied together with complementary finishes. For those not versed in drafting and scale Ihave added a graph to the plan which can be adapted for most rooms and you can see how the layout and scale works. (see also site measuring)
(please note clicking on the illustration will give you a larger view)
Each grid or box represents approximately 300 mm or just under 1 foot. More detailed layouts are shown below and on the following pages but in the first instance to understand the planning realize each square is about 1 foot squared. This should help you establish a sense of scale and understand how much room is required for items and to circulate.
The living room may be divided into usable areas and each area should have a focal point. In the writers opinion it should not be the television which has become a mainstay for the majority of home owners. Television and entertainment items such as games consoles and music centres should be contained or even have their own room if that’s available. Using cabinetry or hidden areas for those items will stop the room being dominated by such and allow the design and decoration of the living room to work its magic and create a pleasant and welcoming atmosphere to be in. Unfortunately in many cases this just isn’t possible so if it’s an area that television is to be viewed in treat it as such.
In this main family room there is an area of respite and conversation by the fireplace with an area for television with couches placed for that purpose and while the machine isn’t being used it’s also an area for conversation with the couches facing each other and a coffee table central to the couches as a focal point. In this living room there are three focal points including the fireplace, the coffee table with surrounding couches and the television viewing area when it is turned on.
To start the process list up the areas that you want in the room, the furniture that you have and that you wish to eventually have in the room. Measure the funiture plan and height as they are 3 dimensional items that will encroach 3 dimensionally. Is it an open plan home with adjoining spaces or isolated and only accessible by doorways? In either case there should be clear allocation of space for circulation and traffic flow especially if the space is limited or going to be congested with a large amount of people eg family. (See also anthropometric and ergonomic data)
When you have defined these parameters, especially the areas, what is each area going to do and what will be its focal point, you can then think about what the areas are used for. Will there be an area that people converse in, an area for reading only, what about coffee and entertaining. Do you have a lot of art, books, collectables that you wish to display. Perhaps the living room is smaller than you would like and you still want to cater for all these requirements. Multiple use of the areas is common in most homes but how do you cater for that.
Still use the bubble diagram initially. Draw the room to scale and measure the furniture that you wish to place in the room.
Here is an example that takes you step by step into planning a living room.
The items that are required and influences that must be allowed for. At this stage we are not concerned with artificial lighting, that will be covered in another article.
- Where are the windows and where does the predominant sun enter the room
- Is there a permanent feature such as a fire place? In this instance yes.
- Storage and occasional furniture will be needed. Ottomans, cabinets side tables.
- An area for coffee and conversation, general relaxing and TV viewing sofas, rugs, television.
- An area for reading or just enjoying the fireplace. Armchairs footstools coffee table.
- Circulation to get to adjoining areas and allow movement within the areas.
Having listed the physical items that have to be fitted into the space we can start working out approximately where they should be placed.
(please note clicking on the illustration will give you a larger view)
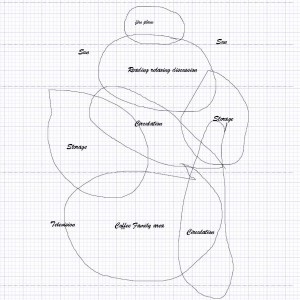
The bubble diagram shows you at a glance with rough circles where initially the areas should be located in relation to each other. With practice you will find that the size of each bubble represents the weight of importance and amount of space relative to the other areas each bubble occupies.
(please note clicking on the illustration will give you a larger view)
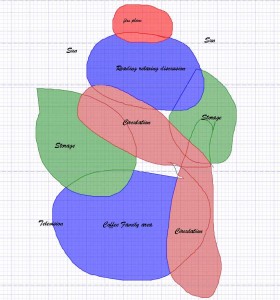
Adding color very quickly identifies the spaces and in doing so will allow the designer (you) to contemplate the size and relevance of each space. Design is a continual process not sporadic.
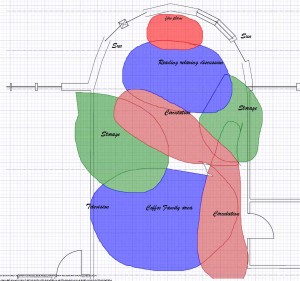
Now we overlay the bubble diagram onto the existing room plan. This is no coincidence that it fits. Either draw the diagram alongside the scale plan or with tracing paper (butter paper) over the top.
(please note clicking on the illustration will give you a larger view)
Our next step is to start defining the areas to the plan in a more formal way.
